The bottom of a closet can hold a surprising number of shoes. Finding the pair you want is another matter. I built this simple shoe holder in about an hour to give that space a second level: shoes underneath, shoes on top, and fewer pairs piled together.
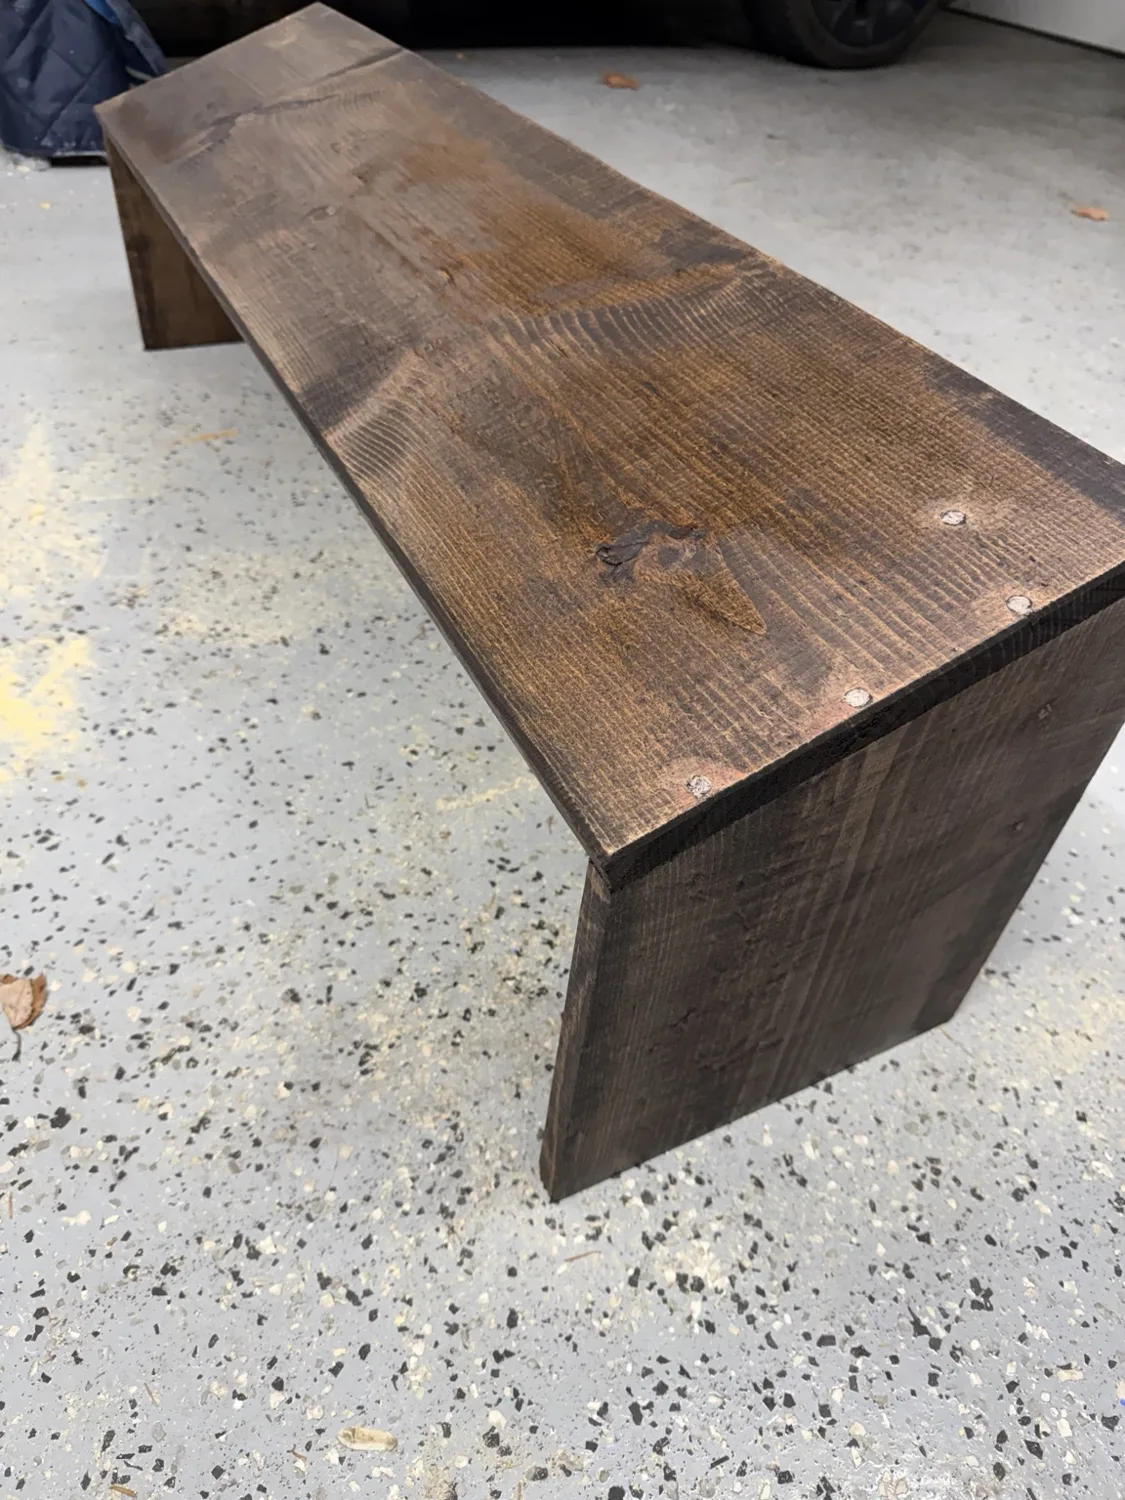
The project is a long wood shelf on two upright end panels, with bracing underneath. You can fit it to your closet and the shoes you actually wear. The photos show my build in the garage, before placing it in the closet.
Start with the shoes and the closet
Measure the usable width and depth at floor level. Baseboards, door tracks and trim can steal space that looks available farther up the wall. Leave enough clearance to slide the finished shelf into place and close the closet doors.
Set your tallest everyday shoes on the floor and measure their height. Add room to slide them in comfortably; that becomes the clear opening under the shelf. Check that shoes on top will also clear hanging clothes. Boots may need their own open space beside the shelf.
Materials and a cut-to-fit plan
- A straight, dry board for the top, deep enough to support your shoes.
- Two matching-depth boards for the upright end panels.
- Wood offcuts for bracing, plus wood screws and wood glue.
- Sandpaper; optional stain, compatible clear finish and matching touch-up filler.
My photos show the idea rather than a measured building plan. Use the relationships below to size your own version.
| Part | Quantity | How to size it |
|---|---|---|
| Top shelf | 1 | Closet width minus installation clearance; choose depth to suit your shoes and door clearance. |
| End panels | 2 | Match the top depth. With the top resting on them, panel height equals the clear opening underneath. |
| Bracing | As needed | Fit beneath the top, inside the end panels, to help resist side-to-side movement. |
| Center support | If needed | For a longer span, add a panel the same height as the end panels. Support needs depend on board thickness, span and load. |
For example: a 10-inch-tall end panel under a ¾-inch-thick top makes the overall shelf 10¾ inches tall. Those are example dimensions, not measurements taken from my shelf.
The tools—and what the tips do
| Tool or bit | Job |
|---|---|
| Tape measure, pencil and combination square | Measure the closet, mark matching end panels and carry square cut lines across the boards. |
| Wood-cutting saw | Cut the top and end panels square. A store cutting service can also handle the basic cuts. |
| Small twist drill bit | Drill pilot holes for the screws, especially near board ends where wood can split. Match the pilot to the screw and wood. |
| Countersink bit | Make a shallow tapered recess for a flat-head wood screw so its head sits flush or just below the surface. |
| Driver bit in the impact driver | Turn the screws. Match the tip to the screw recess—such as Torx, square or Phillips—to reduce slipping and damaged heads. |
| Clamps, level and sanding block or sander | Hold the assembly, check how it sits and remove splinters and sharp edges. |
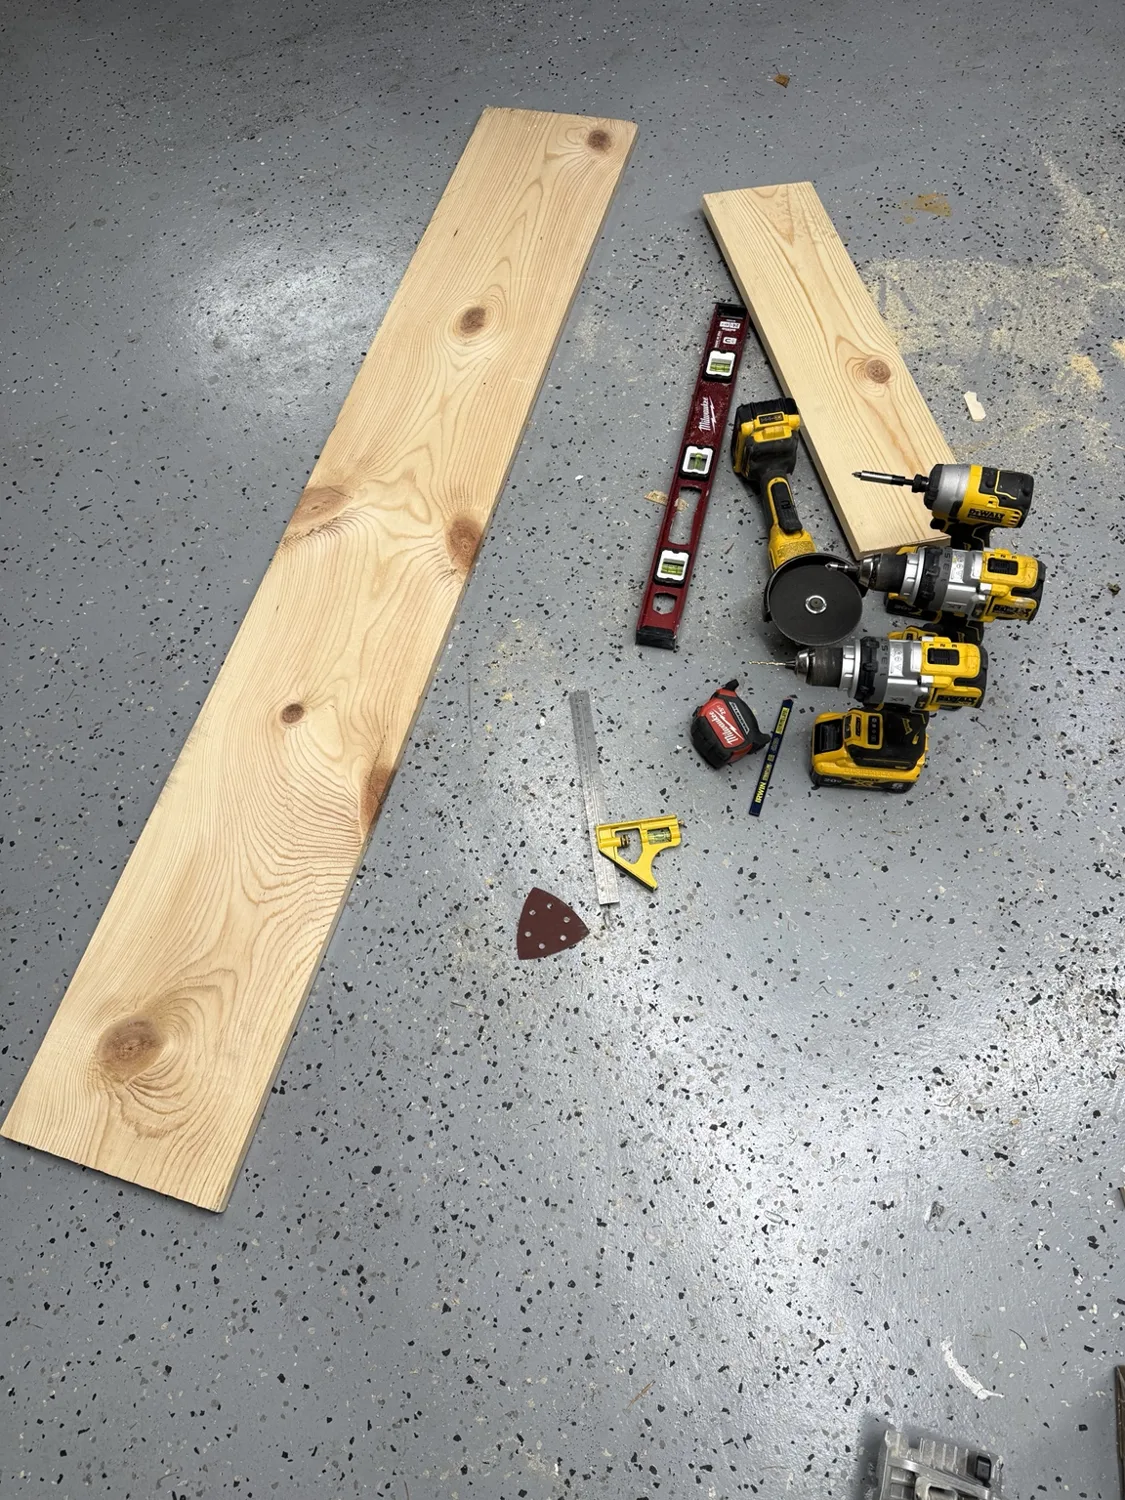
The useful sequence is pilot hole → countersink → drive the screw. The photo shows several cordless tools ready to work. You do not need that many: one drill/driver with bit changes can do the job. An impact driver drives screws; use a drill for controlled pilot drilling and countersinking.
The cutoff/grinding tool in the photo is not needed for this wood project. Use a saw intended for cutting wood. Clamp the work, keep hands clear of the blade, and wear eye and hearing protection and suitable dust protection for cutting and sanding.
Build it in five steps
- Measure and mark. Lay out the top and two equal-height end panels. Mark where the panels will sit under the top, allowing for any overhang.
- Cut and smooth. Make square cuts. Sand rough areas and ease the exposed edges so shoes, hands and clothing will not catch splinters. Dry-fit everything before fastening.
- Attach the ends. With the top upside down on a protected surface, position and clamp the panels square. Predrill and countersink the fastening locations. Use suitable wood screws and avoid driving close to the edges or overtightening into soft wood. Check screw lengths so no points emerge.
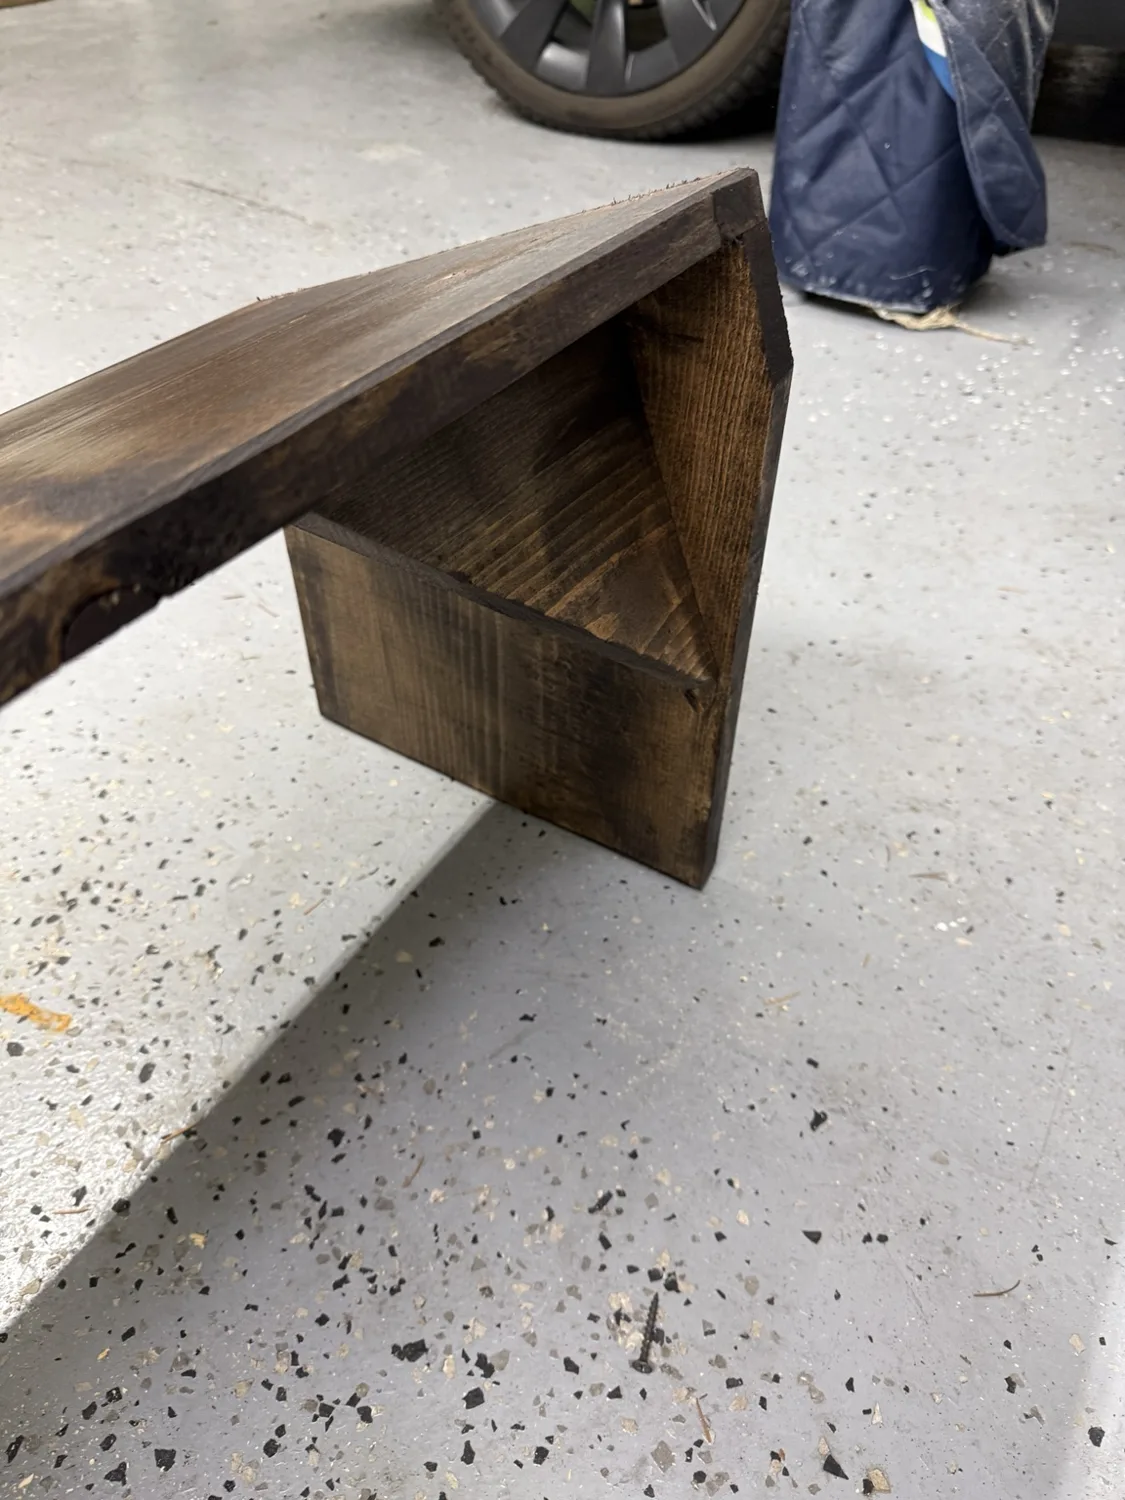
- Add the bracing. Fit wood bracing inside the end assemblies, as shown below. Glue and screw into suitable solid wood connections; do not rely on screws into end grain alone to keep the shelf rigid. Turn it upright and check for rocking or side-to-side movement. Add a center support if the span needs it.
- Finish and place. Remove sanding dust. Leave the wood natural or apply your chosen finish according to its label. Let it dry and cure as directed before putting it beside clothes and shoes. Place the shelf in the closet, confirm it sits securely, then arrange pairs above and below.
One finishing lesson from this example
You can see a few pale filled fastener holes on the stained top. Filler can take stain differently from the surrounding wood, even when it is labeled stainable. Test the combination on a scrap first. If you want less visible repairs, a color-matched touch-up filler used at the appropriate stage for your finish can be easier to blend.
More storage without rebuilding the closet
This is the kind of project I like: a few boards, familiar tools and a useful result. Keep the bottom row easy to reach, put another row on top, and leave room for the boots. The shoes finally get a shelf of their own.