EDITOR'S CORNERReal Projects. Real Solutions.

Rocks That Work:
Building Beautiful, Lasting Steps

Why the right rocks — and the right build — make all the difference.
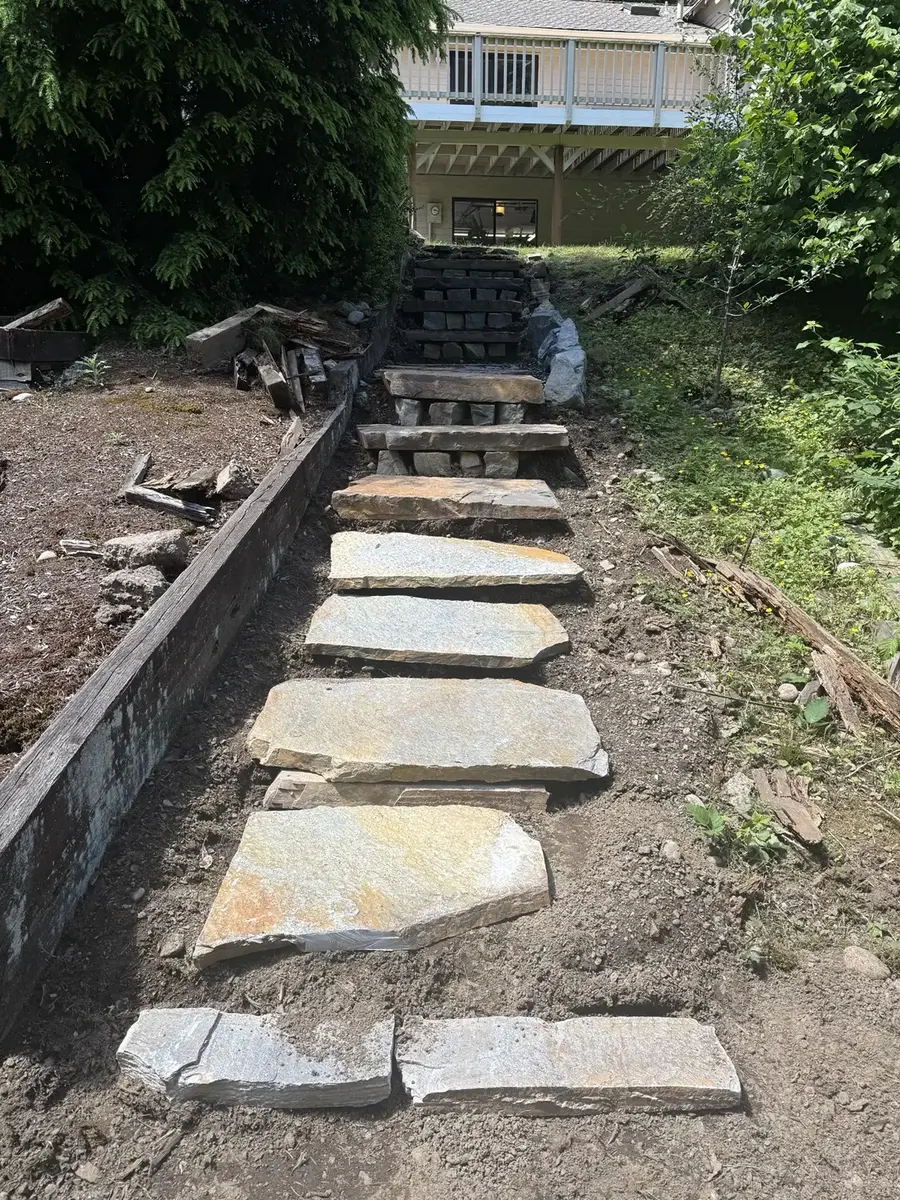
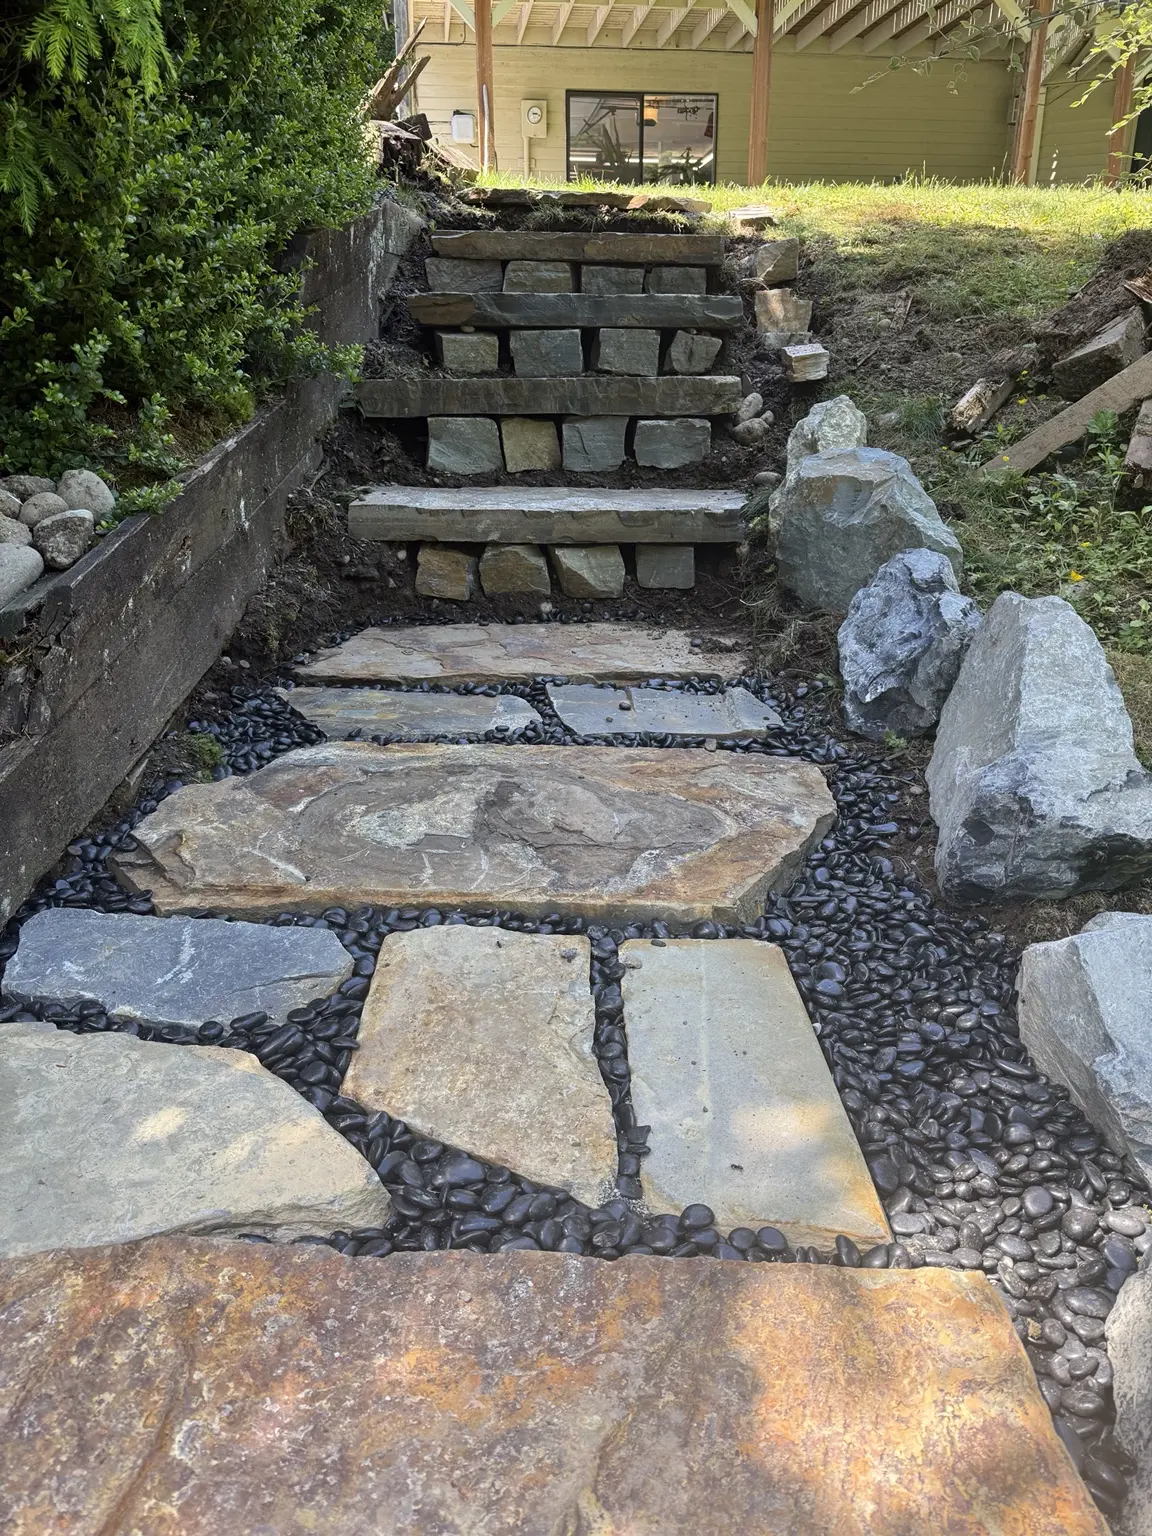
Full view of the natural stone stairway built through my hillside
The full stone stairway is shown from bottom to top so the complete route through the hillside is visible.

The stone steps, start to finish

These photos show how I built the route through the hillside: cutting into the grade, setting the large stone treads, filling the landings and finishing the spaces between the stones.
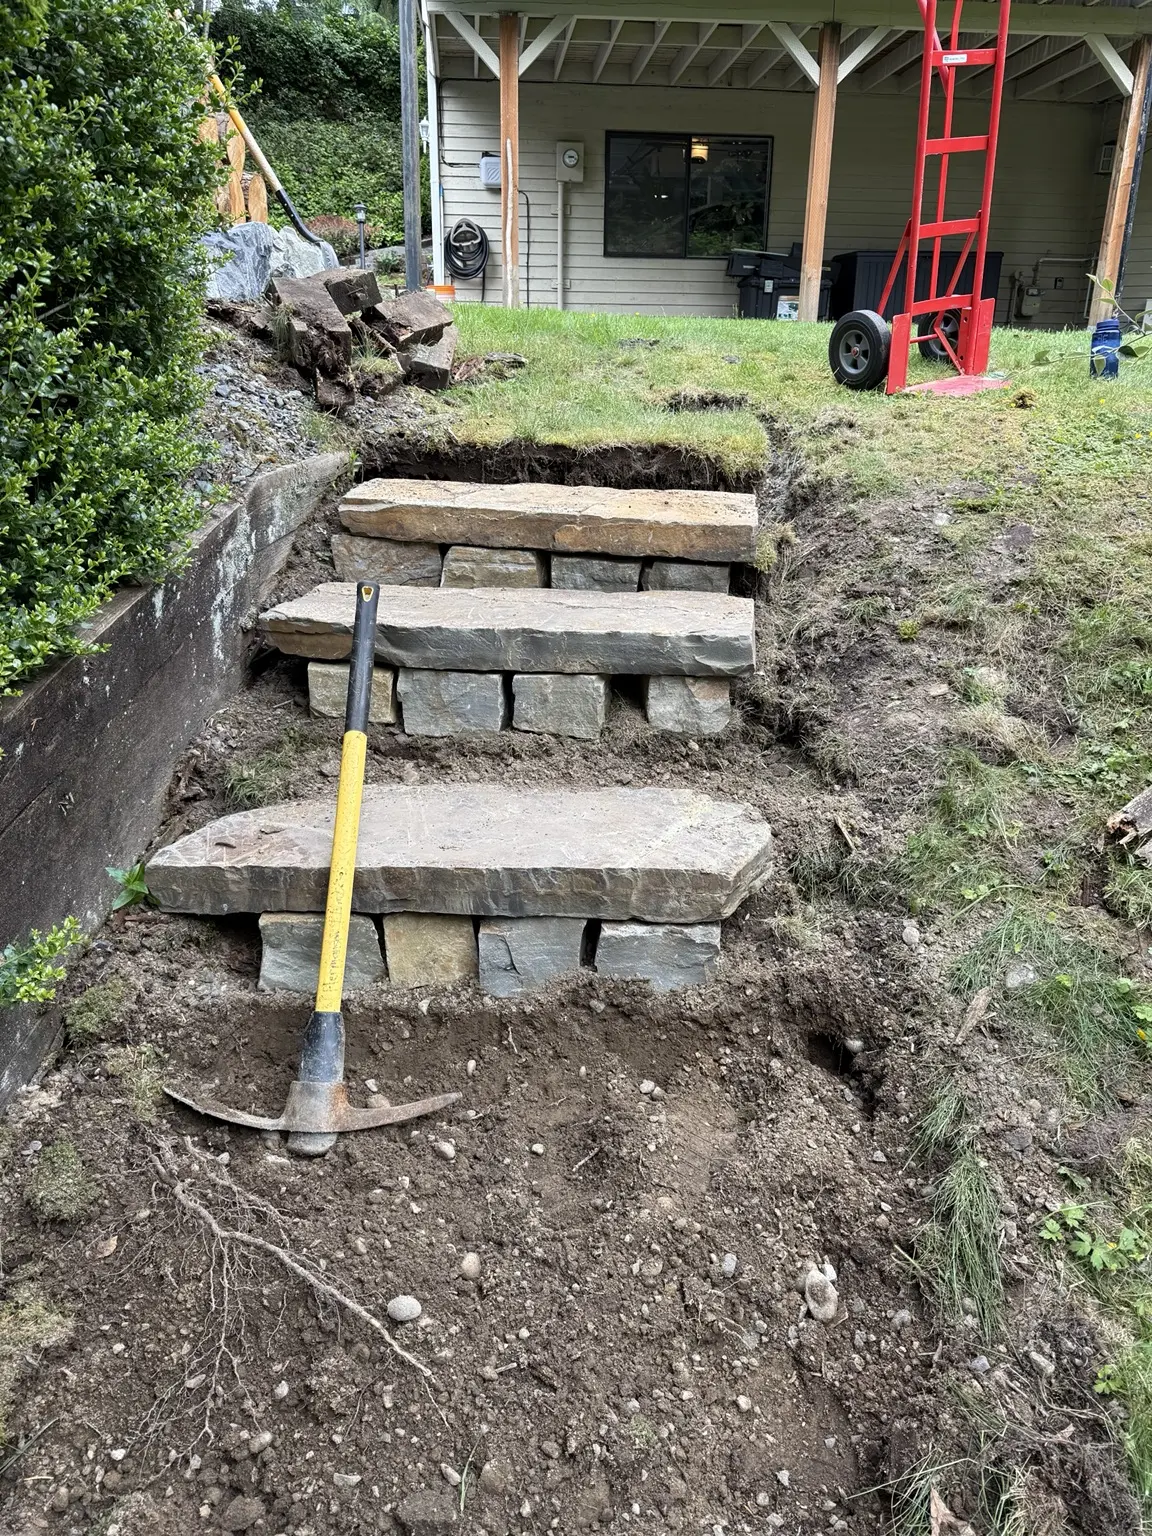
Early construction of large natural stone steps cut into the hillside
1. Cut into the hillsideI excavated the route and began setting the first large stone treads on prepared footing.
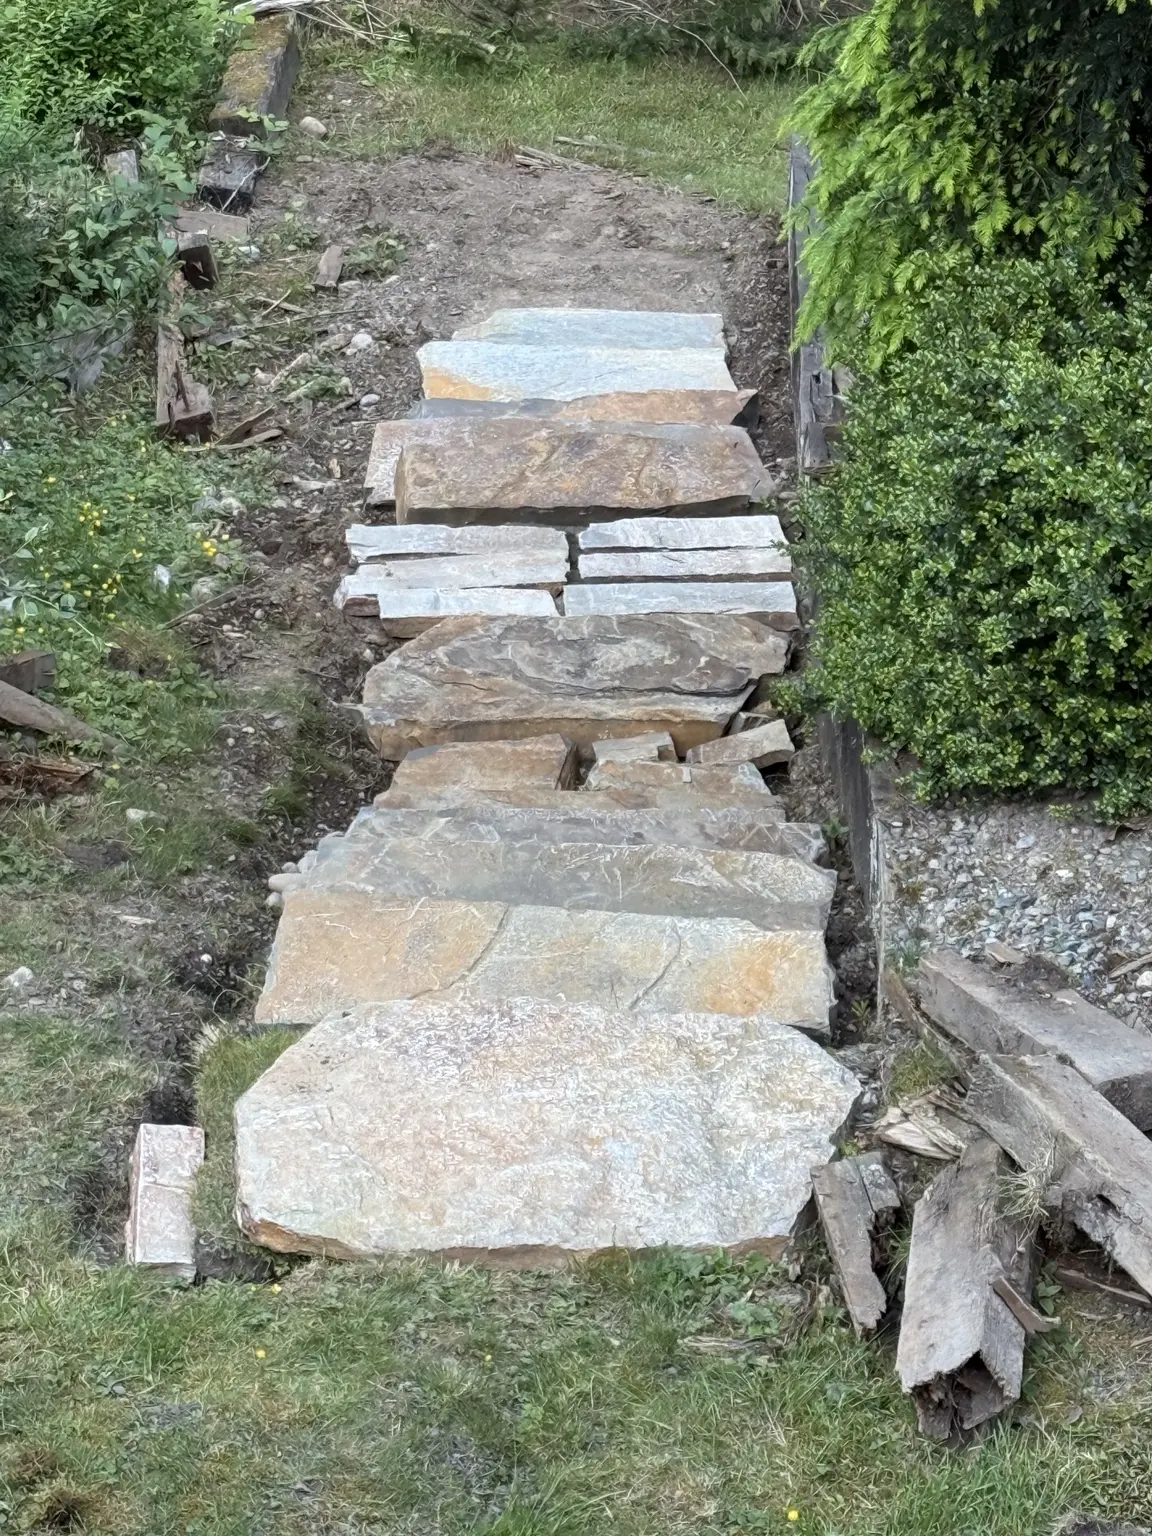
Large natural stone treads dry-set along the hillside route
2. Establish the routeI positioned the heavy treads to check the climb, spacing and overall direction before finishing the surrounding grade.
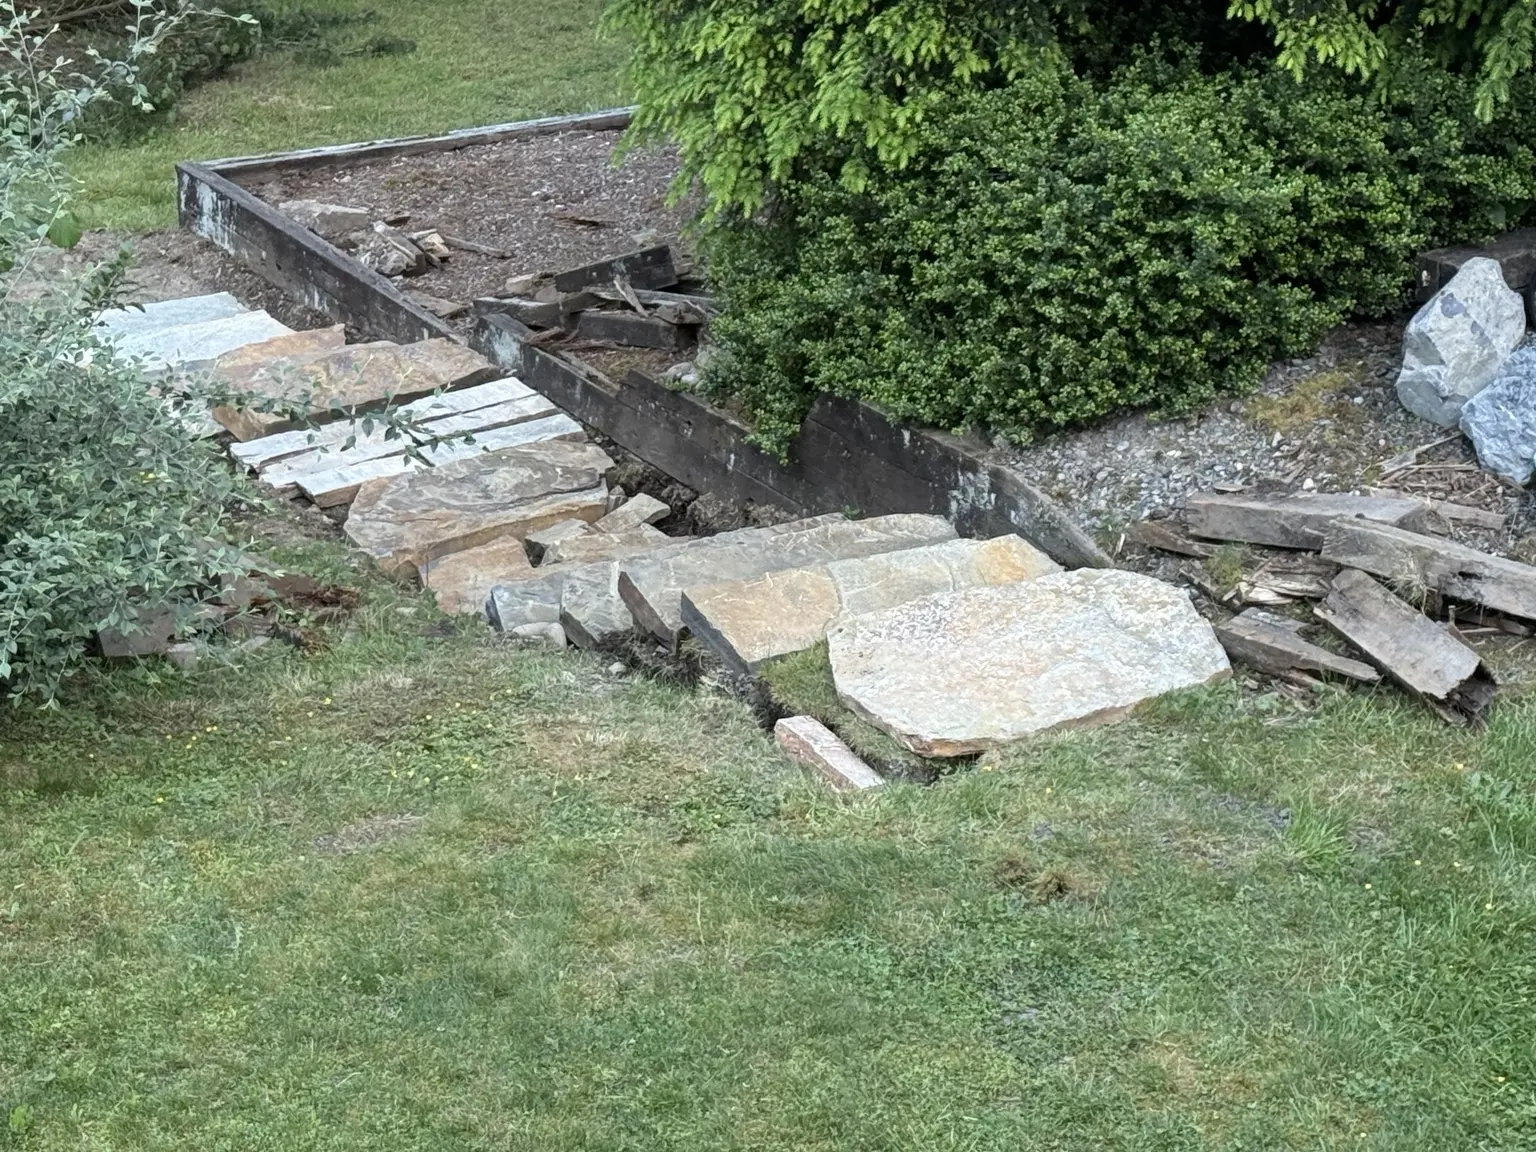
Stone steps under construction beside deteriorated landscape timbers
3. Work through the existing conditionsThe new stone route had to fit between mature landscaping and old retaining timbers that were already deteriorating.
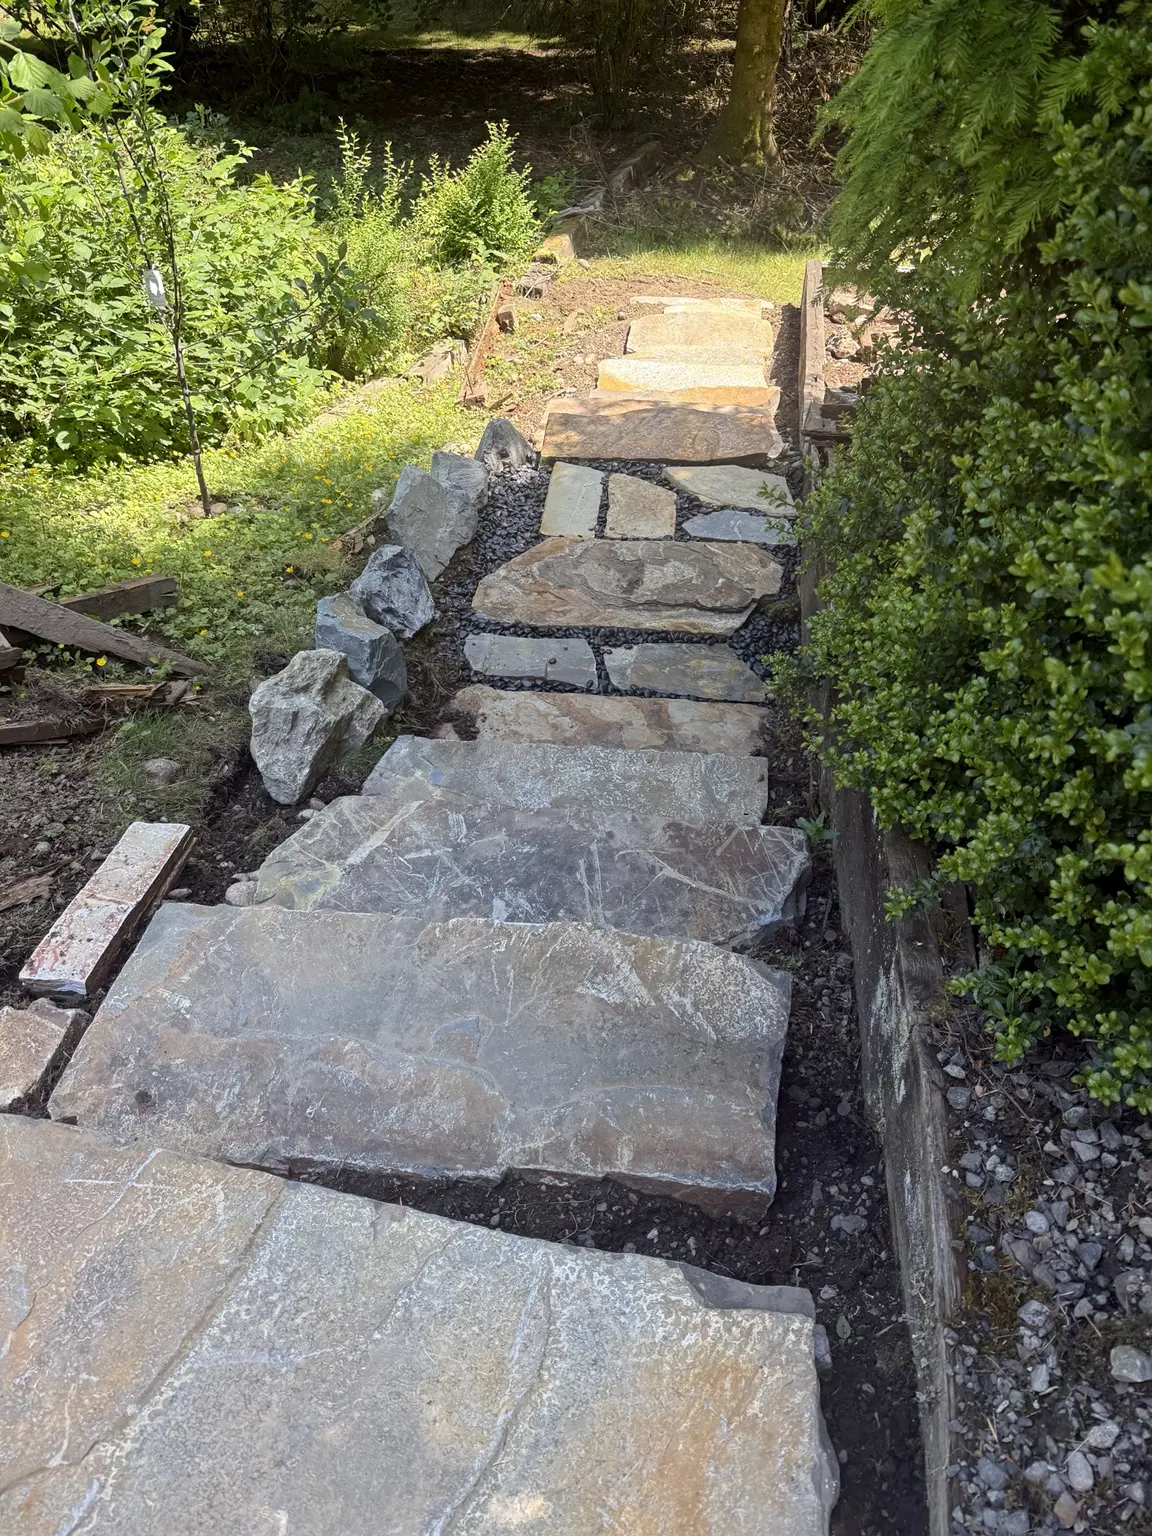
Natural stone stairway and landing taking shape on the hillside
4. Build the landingsWide stone slabs created resting points and helped the stairway feel substantial rather than improvised.
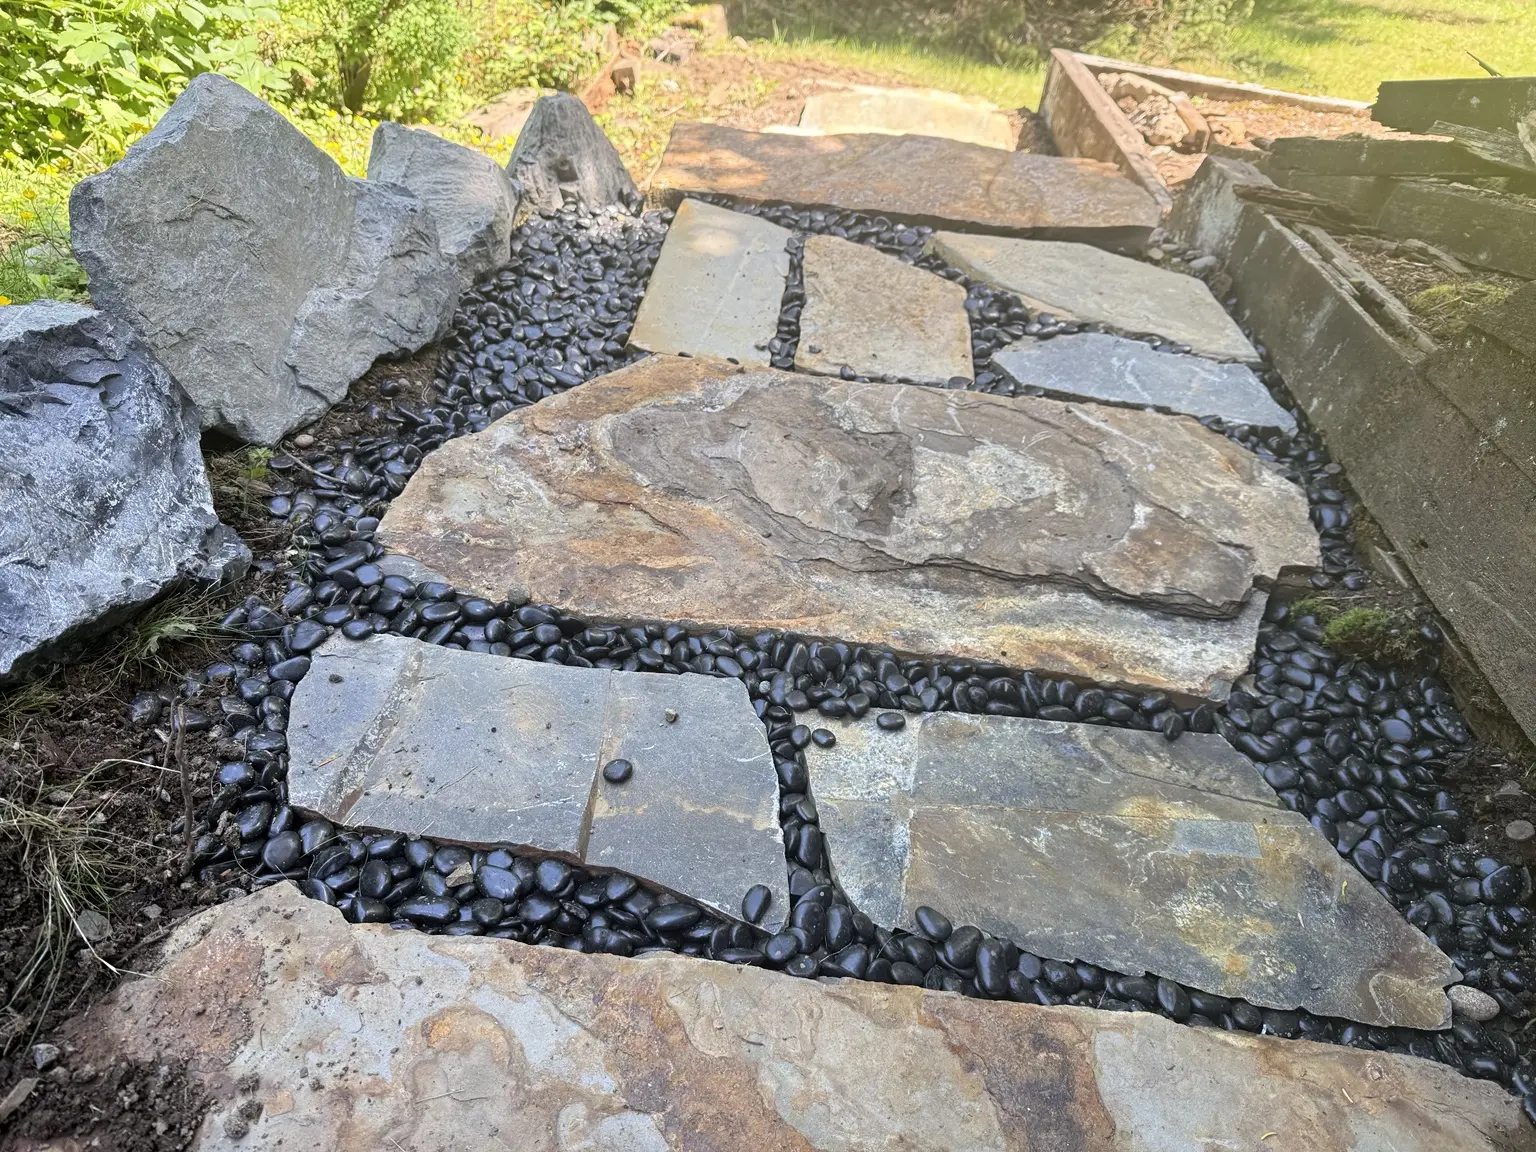
Close view of flat stone landing pieces fitted between large stone steps
5. Fit the landing stonesI combined larger slabs with smaller flat pieces to close the landing while keeping a natural, varied pattern.
Stone landing finished with dark rounded drainage rock between the slabs
6. Finish between the stonesRounded dark rock filled the open joints and gave the landing a clean contrast while allowing water to move through the surface.
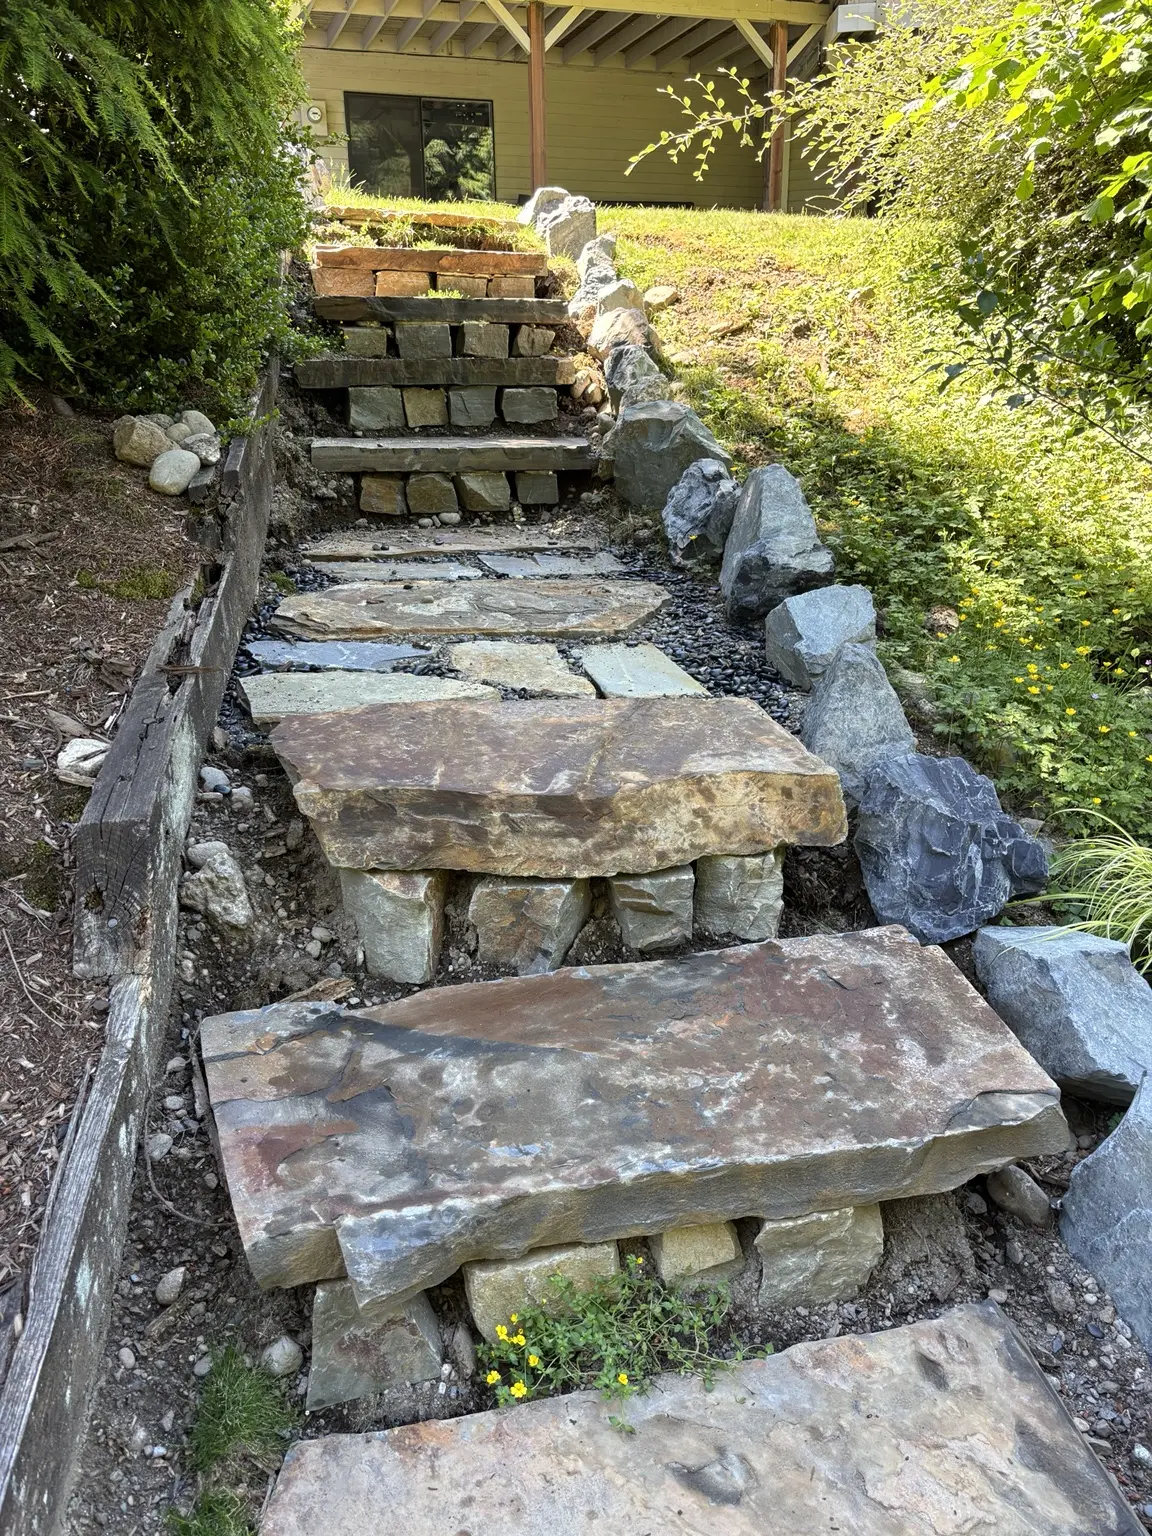
Completed natural stone stairway rising through the landscaped hillside
Finished stone stepsThe completed route combines large stone treads, natural-rock edging and drainage aggregate to create steps that belong in the hillside.

When I set out to replace the failing timber steps on my steep hillside, my goal was not just to create a safer way up and down. I wanted to build something that would last, manage water and look like it belonged in my landscape.

My answer was simple: the right rocks, placed the right way.

Natural Stone: Strong and Timeless

Large natural stone treads bring more than good looks. They are incredibly strong, resist slipping when properly set and age beautifully. Each piece is unique, giving the stairway a character that poured concrete or wood can't match.

Building on a Solid Foundation

Behind every great rock step is thoughtful preparation. I excavated for depth, added compacted base material and worked to give each step a stable, level footing. Rushing this part is where many DIY projects fail.

Drainage Is Everything

Water is the enemy of hillside steps. I shaped the grade to move water away and used drainage aggregate around the stone. This helps reduce erosion and limits movement during freeze-thaw conditions.

Rocks That Lock in Place

I set the treads on solid, compacted material and tightened stone risers in behind them. The goal is for the steps to behave as a system rather than as individual loose pieces.

Blending With the Landscape

Boulders and natural rock along the sides help retain soil, guide water and soften the edges. The result feels natural—like the route has always belonged in my yard. That is one of the best reasons to use real stone in a mature landscape.

EDITOR'S TAKE: This project reminded me that rocks are not just decoration—they are structure, function and beauty all in one. When I build with nature and respect the hill, the result can last for decades.

← Back to Editor's Corner